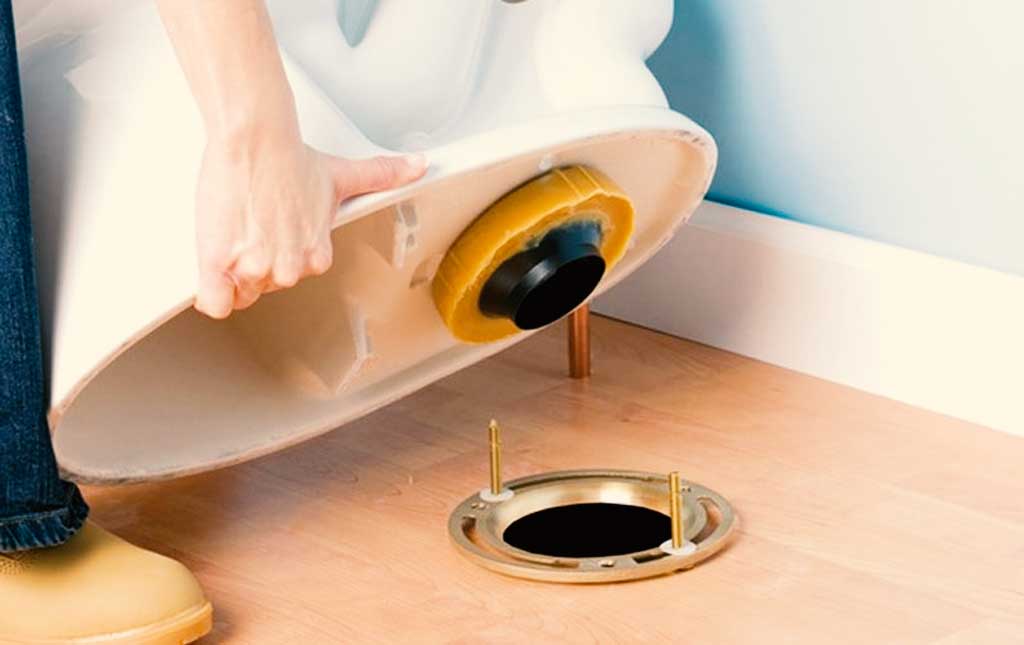
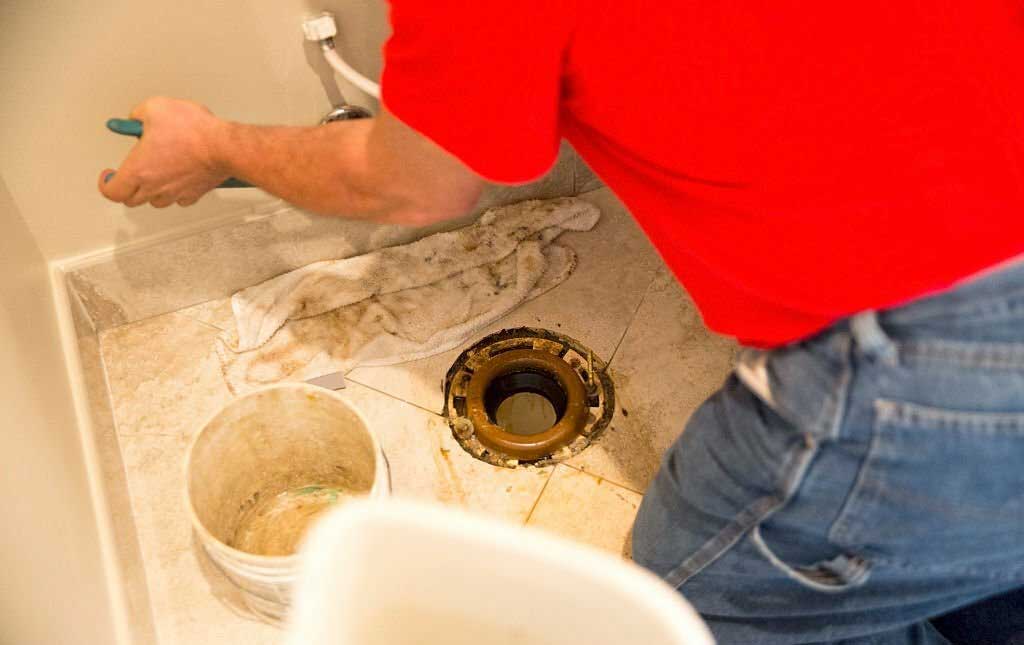
To replace a toilet flange, you need to first remove the toilet, disconnect the water supply, and unscrew the old flange from the floor. Then, position the new flange over the drain pipe, secure it to the floor, and reattach the toilet.
If you want to know step-by-step guidance on how to replace toilet flange effortlessly, you have come to the right place. Replacing a toilet flange may seem like a daunting task, but with the right knowledge and preparation, it can be a relatively simple project. The toilet flange is a crucial component that connects the toilet to the drainpipe, providing a secure seal and allowing waste to be effectively flushed away.
By following a few straightforward steps, you can quickly and efficiently replace a toilet flange, ensuring the toilet functions smoothly and securely. We will guide you through the process, providing you with the essential information to successfully complete this DIY project.
Understanding The Purpose And Role Of A Toilet Flange
A toilet flange plays a crucial role in the successful installation and functioning of a toilet. It is a circular, flat piece made of metal or plastic that connects the toilet to the floor and the waste pipe. The main function of the flange is to provide a secure and watertight connection between the toilet and the drain pipe.
The flange acts as a support for the toilet, keeping it stable and preventing any wobbling or movement. It also seals off the gap between the toilet and the floor, preventing the escape of sewer gases into the bathroom. This not only ensures a hygienic environment but also protects the structural integrity of the floor.
A well-functioning toilet flange is of utmost importance for proper toilet installation. If the flange is damaged or improperly installed, it can lead to leaks, unpleasant odors, and even damage to the surrounding flooring and structures. Therefore, it is essential to regularly inspect and replace the flange if needed to avoid any potential issues.
Identifying Common Issues With A Toilet Flange
Identifying common issues with a toilet flange is crucial for ensuring the proper functioning of your toilet. One common problem is leaking or water seepage around the base of the toilet. This can be caused by a damaged or worn-out toilet flange, which is the pipe fitting that connects the toilet to the floor and the plumbing system.
Another issue to watch out for is a wobbling or loose toilet. When the toilet is not securely fastened to the floor, it can lead to leaks and further damage to the flange. Additionally, unpleasant odors coming from the toilet area can indicate a problem with the flange seal.
If the seal is broken, sewer gases can escape and cause foul smells. It is important to address these issues promptly to prevent further damage and ensure the proper functioning of your toilet.
Preparation: Gathering The Necessary Tools And Materials
To successfully replace a toilet flange, it is important to start by gathering all the necessary tools and materials. Here is a list of tools you will need for the replacement process:
- Adjustable wrench
- Hacksaw
- Putty knife
- Screwdriver
- Tongue-and-groove pliers
- Plunger
- Closet bolts
- Wax ring
- Plumbers’ putty
- Pipe thread tape
Additionally, you may need some materials to ensure a successful toilet flange replacement:
- New toilet flange
- New toilet bolts
- PVC or ABS cement (depending on the type of flange)
- Teflon tape
By having these tools and materials ready, you will be well-prepared for the task of replacing a toilet flange.

Step 1: Removing The Toilet And Old Flange
To begin replacing a toilet flange, you first need to shut off the water supply and empty the tank. Locate the shut-off valve, usually located on the wall behind the toilet, and turn it clockwise to stop the water flow. Then, flush the toilet to remove any residual water in the tank and the bowl. Use a sponge or a towel to soak up any remaining water.
Next, detach the toilet from the floor by removing the nuts that secure it to the flange. These nuts are typically found on each side of the toilet base, underneath a plastic cap. Loosen the nuts with a wrench carefully lift the toilet bowl off the flange and set it aside.
With the toilet removed, you can now proceed to remove the old flange. Inspect the flange for any damage or corrosion. To remove it, you may need to unscrew it from the floor or cut it off using a saw. Ensure that the flange is completely removed before proceeding to the next steps.
Step 2: Evaluating The Subfloor And Drain Pipe
When replacing a toilet flange, it is important to evaluate the subfloor and drain pipe to ensure that everything is in good condition and properly aligned. Start by inspecting the subfloor for any damage, such as rot or water stains. Look for any signs of weakness or instability, as this could indicate the need for subfloor repairs or reinforcement.
Next, check the condition of the drain pipe. Look for any cracks, leaks, or signs of corrosion. Ensure that the pipe is securely connected to the flange and that there are no obstructions or blockages. If any issues are found, it may be necessary to repair or replace the drain pipe to ensure proper functioning of the toilet.
Step 3: Selecting The Right Replacement Flange
Choosing the appropriate type and material for the new flange:
When replacing a toilet flange, it is important to select the right replacement flange to ensure a proper and secure fit. Here are some key considerations:
- Type: There are a few different types of flanges available, including plastic, brass, and stainless steel. Each has its own advantages and disadvantages.
- Material: When choosing a replacement flange, consider the material it is made of. Plastic flanges are durable and resistant to damage, while brass and stainless steel flanges offer added strength and longevity.
- Compatibility: Ensure that the replacement flange is compatible with both the existing toilet and the floor. Check the dimensions and specifications to ensure a proper fit.
By carefully considering the type and material of the replacement flange, as well as ensuring compatibility with the existing toilet and floor, you can successfully replace a toilet flange and ensure a tight seal for your toilet.
Step 4: Installing The New Flange
Replacing a toilet flange may seem like a daunting task, but with the right steps, it can be a relatively simple process. In Step 4 of the installation process, you will need to install the new flange.
Start by placing the new flange over the drain pipe, ensuring that it fits securely. Once the flange is in position, it’s crucial to secure it to the floor using screws or bolts.
This will prevent any movement or leaks. Take the time to ensure that the flange is properly aligned with the toilet and is level. This step is important for the stability and performance of your toilet in the long run.
Step 5: Reattaching The Toilet
Placing a new wax ring on the flange:
- Carefully remove the old wax ring and discard it.
- Ensure that the flange is clean and free from any debris.
- Take a new wax ring and place it directly on top of the flange, ensuring a proper fit.
- Lift the toilet bowl and align it with the flange.
- Slowly lower the bowl onto the wax ring, making sure it sits flush against the floor.
- Once the bowl is in position, secure it by tightening the bolts evenly on both sides.
- Reconnect the water supply line to the fill valve at the bottom of the toilet tank.
Tips: When tightening the bolts, be careful not to overtighten them, as it may cause damage to the toilet or the flange. Also make sure the toilet is level before tightening the bolts to prevent any rocking or instability.
Checking For Leaks And Proper Toilet Functioning
When replacing a toilet flange, it is important to check for leaks and ensure the toilet functions properly. After installing the new flange, turn on the water supply and carefully inspect for any signs of leaks around the base of the toilet.
Make sure the water connections are tight and secure. Additionally, test the toilet’s stability by gently rocking it back and forth. If it wobbles or feels unstable, it may require further adjustments. Furthermore, check the flushing capabilities of the toilet by flushing multiple times and observing the water flow and drain.
If there are any issues, such as weak flushing or incomplete drain, troubleshoot and make necessary adjustments. It is always recommended to consult a professional if you encounter any difficulties during the process.
Regular Maintenance To Prolong The Life Of The Toilet Flange
Regular maintenance is essential to prolong the life of the toilet flange. One important aspect of maintenance is cleaning the flange and the surrounding area regularly. This helps to prevent the buildup of grime, debris, and mold that can cause damage over time.
It is also important to be cautious with heavy objects that are placed on the toilet, as excessive weight can put strain on the flange and potentially lead to cracks or leaks. Conducting regular inspections for any signs of damage or deterioration is also crucial.
This includes checking for any loose or wobbly toilets, cracks in the flange or surrounding area, or signs of water leakage. By practicing these regular maintenance steps, you can extend the life of your toilet flange and avoid costly repairs or replacements.
Frequently Asked Questions (FAQs) – How To Replace Toilet Flange
Can I Replace Toilet Flange Myself?
Yes, it is possible to replace a toilet flange yourself. Just make sure to follow the necessary steps and precautions.
Does The Toilet Flange Get Glued To The Pipe?
Yes, the toilet flange is glued to the pipe for a secure installation.
How Do I Know If My Toilet Flange Needs Replacing?
To determine if your toilet flange needs replacing, look for signs like leaks, loose toilet bolts, and wobbly toilets. Additionally, if you notice a foul odor or water seeping around the base of the toilet, it may indicate a damaged flange. It’s best to consult a professional plumber for an accurate assessment.
How Do You Know If Your Toilet Flange Is Bad?
When you notice a leak around the base of the toilet, or if the toilet wobbles when you sit on it, it might indicate a bad toilet flange. Another sign is if you can smell sewer gas inside your bathroom. It’s important to inspect the flange to determine if it needs replacement.
Conclusion
To conclude the question – How to replace toilet flange?, Replacing a toilet flange may seem like a daunting task, but with the right tools and steps, you can do it yourself. By following the tips provided in this blog post, such as using a flange removal tool and applying a new wax ring, you can ensure a tight and secure seal for your toilet.
Remember, regular maintenance is key to avoiding costly plumbing issues in the future. So don’t hesitate, roll up your sleeves, and give your toilet flange the attention it deserves. Your bathroom will thank you!

